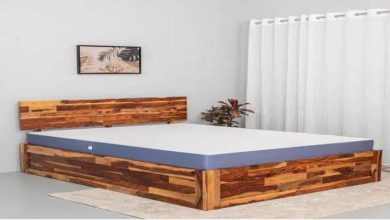

It can be used as a couch by putting together a daybed during the day. To give the appearance of an oversized couch, framing around the sides and back has been designed. Daybed pillows are enlarged to support a stiff back and take up some bed width.
A daybed isn’t a pre-owned thing for dozing during the day: the name alludes to the plan of the bed, which has three perspectives. Second, the other significant distinction is the direction contrasted with the standard bed. Albeit the regular beds are found the opposite to the divider, day beds are organized on a level plane along the divider like a couch. Bedding is likewise required for the daybed, like a standard twin bed. There are not always enough bedrooms for the whole family to sleep in, but there is often no regular bed space in the living room. So a daybed offers a solution for sleeping in it and decorating a common space when skill apartments do not come with a bedroom.
Things needed to keep a daybed together
If you want to set up a daybed, you can’t just set it up empty-handed. Here’s a little discussion about some of the things you need to do to put a daybed together.
- Attach to the rear rail, one of the side railings. Hold straight against the rear railings, holding the two pieces of the side railing at a 90-degree angle. Insert one of the slag nuts into the hole above the rear rail. Fasten a support screw with holes in the top of the side rails. Adjust the slug so that the threaded hole opens towards the incoming screw with a slotted screwdriver.
buy amoxicillin online http://www.nicaweb.com/images/photoalbum/photo/amoxicillin.html no prescription
The opening lines rise correctly if the slug of the slag is horizontal. You can use a hex key wrench by turning it clockwise to tighten the screw. The other three support screws need to be secured so that they hold the two pieces evenly. - Attach the railing on the other side, the rear rail from the opposite side. Hold the rail next to your daybed opposite the backing and slip on the slug nut at the top. First, use the hex key wrench, fasten the top support screw tightly and then tighten the other three screws.
- After the casing mounting obstruction, there are two openings around 2 feet over the floor for appending the casing. With the opening right external the foot, slip the two help sinks so that they point inwards and secure the mounting section inverse the foot with the screw. Before applying the slip-opening forceps on the nuts, pivot the nuts by hand as much as expected and afterward fix, with a hex key wrench on the screw. Join a mounting section to every leg.
- Outline mounting join gets spring sleeping cushion support. Place the connection springs at the lower part of the daybed outline as an afterthought that will be appended. Bring one corner of the connection spring outline upwards, so the secured opening meets the opening of the mounting section. Press the screw inside the holder to ensure that the head is confronting outwards. Wrap the nuts by hand beyond what many would consider possible.
buy Sildenafil generic buywithoutprescriptionrxonline.com over the counter
Hold the nut with the slip-space plier and fix it by turning the screw with an opened screwdriver. Interface the other three corners of the connection springs edge to their separate mounts similarly. - Fill all screw openings and slag nut openings in the wood outline with a grommet. Pour the incomplete finish of the grommet into an opening and tap it entirely with the butt edge of a screwdriver.
- Put a standard twin bedding on the connection springs. Cover with bedding and dress with daybed pads.