You’ve just returned from an incredible hike, only to discover that your action camera footage is a shaky, unwatchable mess. The stunning panoramic views you tried to capture look like they were filmed during an earthquake, and that sunset time-lapse? Completely ruined by a subtle drift you didn’t notice in the moment. It’s a frustrating experience that nearly every hobbyist photographer and videographer has faced at some point. The truth is, even the most advanced action camera can only do so much when it’s held in an unsteady hand or balanced precariously on a rock.
Why Portable Tripods are Essential Action Camera Accessories
No matter how steady you think your hands are, handheld shooting introduces micro-vibrations that even the best in-camera stabilization can’t fully eliminate. These tiny movements compound over time, turning long exposures into blurry smears and making extended video clips feel jarring to watch. For hobbyist photographers and videographers who invest time and energy into reaching the perfect location or setting up the ideal scene, relying solely on handheld technique is a gamble that rarely pays off.
A portable tripod solves this problem at its root by providing a fixed, stable platform for your action camera. That stability unlocks creative possibilities that simply aren’t available when shooting freehand. Time-lapse sequences — whether capturing a blooming sunset or bustling city traffic — demand absolute stillness over minutes or even hours. Self-portraits and group shots in remote locations become effortless when you can mount your camera, set a timer, and step into the frame. Even standard video footage gains a polished, cinematic quality when the camera isn’t bouncing with every breath or footstep.
Beyond image quality, the right tripod encourages you to slow down and think more intentionally about composition, framing, and lighting. It transforms casual snapshots into deliberate, well-crafted images. For hobbyists who want professional-looking results without hauling around a professional-grade kit, portable photography gear is the single most impactful upgrade available. A tripod that folds small enough to strap onto a daypack or slip into a jacket pocket means you never have to choose between mobility and stability — you carry both wherever the adventure takes you.
Top Picks: Reviewing the Best Portable Tripods for Enthusiasts
Choosing the right portable tripod can feel overwhelming when every product claims to be the lightest, sturdiest, or most versatile option available. To simplify your search, we’ve narrowed the field to a handful of standout models that genuinely deliver on their promises — each serving a slightly different need within the hobbyist community. Whether you’re scrambling up mountain trails, setting up a clean desk shot, or simply looking for the best value, one of these picks will fit your workflow.
Falcam Tripod: A Compact Powerhouse for On-the-Go Creators
If your shooting life revolves around outdoor adventures, the Falcam Tripod deserves serious attention. Built with carbon fiber legs, it strikes a rare balance between featherlight portability and the kind of rigid stability you’d expect from a much heavier setup. The integrated ball head allows smooth, precise angle adjustments — critical when you’re framing a sweeping landscape or locking in a low-angle perspective on uneven terrain. When folded, the tripod collapses to a remarkably small footprint, easily attaching to the outside of a daypack or tucking inside a camera sling bag. What sets it apart from similarly sized competitors is the confidence it inspires once deployed: the legs grip securely on rocks, dirt, and sand, and the locking mechanisms feel solid rather than flimsy. For hobbyists who refuse to compromise on image quality just because they’re miles from the nearest road, this compact carbon fiber tripod is a genuine game-changer that punches well above its weight class.
Best Desktop Tripod for Cameras: Stability in a Small Package
Not every great shot happens outdoors. Desktop tripods cater to an entirely different but equally important set of scenarios — think tabletop product photography, overhead cooking videos, streaming setups, and video calls where you want a polished, professional appearance. The best desktop tripod for cameras offers a low center of gravity and rubberized feet that prevent any sliding on smooth surfaces. Models with adjustable legs let you fine-tune the height and angle without stacking books underneath, and a detachable ball head gives you the freedom to tilt and rotate your action camera precisely. These compact tripods are also surprisingly useful as travel companions; their small size means they fit in a coat pocket, ready to stabilize a quick shot at a café table or hotel balcony railing. For hobbyists building a home studio on a budget, a quality desktop tripod delivers immediate, visible improvements to content quality without demanding any extra space.
Other Notable Affordable Tripod Solutions
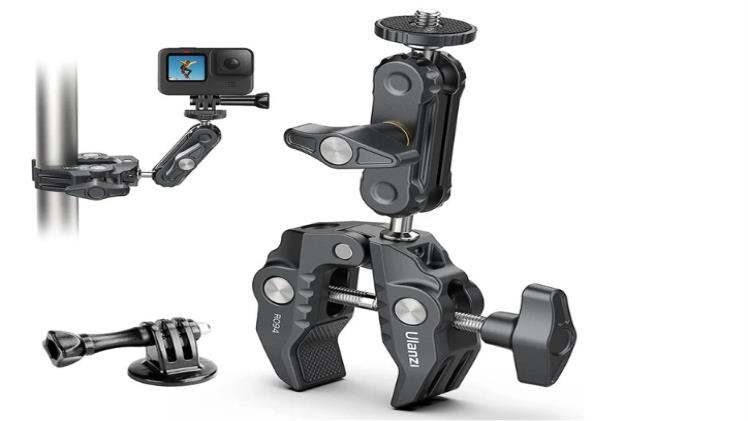
Beyond the options above, flexible-leg tripods remain a beloved choice for creators who need maximum adaptability. Their bendable, wrappable legs conform to tree branches, fence posts, and irregular surfaces where traditional tripods simply can’t operate, making them ideal for spontaneous shooting in unpredictable environments. Meanwhile, aluminum travel tripods from well-established accessory brands like Ulanzi offer a compelling middle ground — they’re slightly heavier than carbon fiber alternatives but provide full-size height extension and robust build quality at a fraction of the cost. If you’re a hobbyist who shoots in varied conditions and wants affordable tripod solutions that cover the widest range of situations, keeping one flexible mini tripod and one full-height travel tripod in your kit ensures you’re never caught without the right support.
How to Choose Your Ideal Tripod: A Hobbyist’s Guide
Knowing which tripods exist is only half the battle — the real challenge is matching the right one to your specific needs. With so many variables at play, a structured approach to decision-making saves you from buyer’s remorse and ensures every dollar you spend translates into better content.
Matching Your Tripod to Your Photography Style
Your shooting habits should dictate your tripod choice more than any spec sheet or online review. If you primarily vlog or create run-and-gun travel content, prioritize tripods that weigh next to nothing and deploy in seconds — fumbling with complicated leg locks while your subject walks away defeats the purpose. A compact carbon fiber tripod or a lightweight mini tripod with a quick-release plate keeps your setup time under ten seconds, which matters when you’re documenting fast-moving experiences. Landscape photographers, on the other hand, need tripods that extend to eye level and remain rock-solid in wind, so taller legs with spiked or claw-footed options become essential. If macro photography or product shots dominate your workflow, look for tripods offering a low-angle mode or fully splayed legs that bring the camera just inches from a surface. Flexible-leg models also excel here, since you can wrap them around objects to achieve unusual perspectives that rigid tripods simply cannot reach. The key insight is that no single tripod is universally “best” — the best one is the one that disappears into your workflow and lets you focus entirely on the creative side.
Key Specs to Decode: Weight, Height, Load Capacity, and Head Type
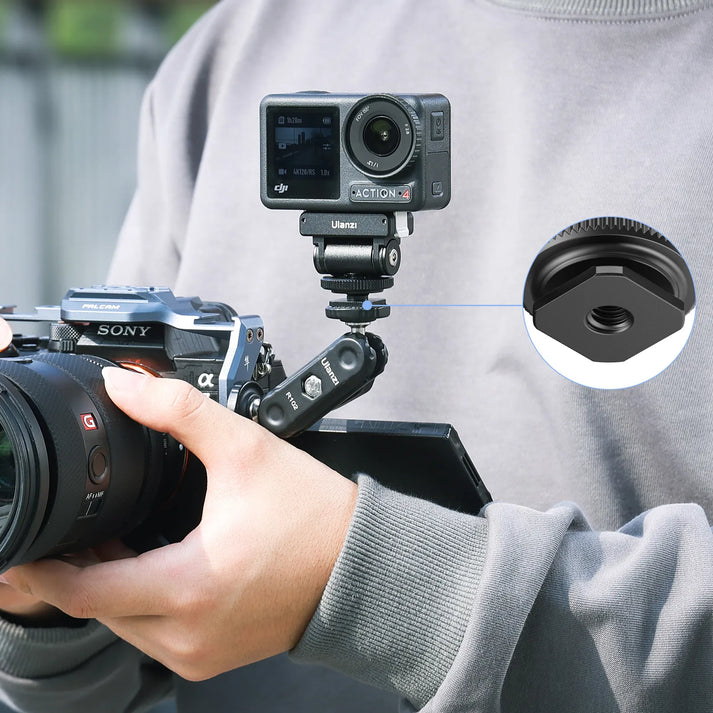
Tripod specifications can read like a foreign language, but understanding four core numbers tells you almost everything you need to know. Weight is your portability indicator: anything under one pound fits comfortably in a daypack, while tripods approaching two pounds start to feel noticeable on long hikes. Maximum height determines whether you can shoot at eye level or are limited to tabletop perspectives — most hobbyists find that a tripod extending to at least chest height covers the majority of outdoor scenarios. Load capacity tells you how much gear the tripod can safely support; your action camera is light, but once you add a mounting adapter, microphone, or LED light panel, those grams add up quickly, so aim for a capacity that provides a comfortable margin beyond your total gear weight. Finally, head type affects how fluidly you can reposition the camera. Ball heads offer fast, intuitive adjustments in any direction, making them ideal for quick composition changes. Pan-tilt heads provide more controlled, axis-specific movement suited to video panning. For most hobbyists using action camera accessories, a ball head strikes the right balance between speed and precision without adding unnecessary bulk.
Your Step-by-Step Solution: Finding and Using Your Perfect Tripod
Understanding tripod features and reading reviews is valuable, but it means nothing until you take deliberate action. This step-by-step approach turns research into a confident purchase — and then helps you start creating better content immediately.
Step 1: Assess Your Primary Use Case and Budget
Before browsing a single product page, sit down and honestly answer two questions: where will I use this tripod most often, and how much am I willing to spend? If eighty percent of your shooting happens on trails and outdoor excursions, a compact carbon fiber tripod should top your list because every ounce matters when you’re carrying water, food, and other gear. If you mostly film at home — tutorials, product reviews, or video calls — a desktop tripod delivers everything you need at a lower price point. Travelers who split time between indoor and outdoor shooting might benefit most from a flexible-leg model that handles both environments. Once you’ve identified your primary scenario, set a budget that reflects realistic hobbyist spending. You don’t need to invest heavily to see a dramatic improvement; many of the affordable tripod solutions discussed earlier outperform models costing two or three times as much. Having a clear use case and price ceiling immediately eliminates dozens of irrelevant options and focuses your search.
Step 2: Compare Features Against Your Shortlist
With your use case defined, build a shortlist of three to five tripods and run each one through a simple comparison checklist. Start with weight and folded length — will it actually fit in or on your bag without becoming a burden? Next, check maximum extended height to confirm it reaches the perspectives you need most often. Verify that the load capacity exceeds your total mounted gear weight by at least a reasonable margin, accounting for any accessories you plan to add later. Finally, confirm the head type suits your primary content: ball heads for fast repositioning during photo-heavy outings, pan-tilt heads if smooth video panning is a priority. Lay these details side by side in a simple spreadsheet or even a handwritten chart. The tripod that checks the most boxes aligned with your Step 1 priorities is almost certainly the right choice. This disciplined comparison prevents impulse purchases driven by flashy marketing and keeps your decision grounded in practical needs.
Step 3: Master Basic Setup and Creative Techniques
Once your tripod arrives, resist the urge to toss it in your bag untested. Spend fifteen minutes at home learning how it operates. Practice extending and locking the legs until the motion feels automatic, then mount your action camera and confirm the quick-release plate or adapter sits securely with no wobble. Use a bubble level — many tripods include one built into the base — to ensure your horizon line is perfectly straight, since even a slight tilt becomes glaringly obvious in wide-angle footage. With the basics down, try a few creative techniques that showcase your tripod’s value immediately. Set up a simple time-lapse of clouds or street traffic to experience the stillness a tripod provides over extended recording. Experiment with low-angle shots by splaying the legs wide or wrapping flexible legs around a railing for a unique vantage point. Practice slow panning by loosening the ball head just enough to allow controlled rotation while recording video. These small exercises build muscle memory so that when you’re out in the field chasing golden-hour light, setup becomes second nature and your focus stays entirely on capturing the moment.
Elevate Your Footage with the Right Portable Tripod
A portable tripod isn’t just another accessory collecting dust in your gear bag — it’s the single most transformative upgrade a hobbyist can make to immediately elevate the quality of every photo and video they capture. The stability it provides eliminates the frustration of shaky footage, while the creative freedom it unlocks — from time-lapses and self-portraits to cinematic panning shots — turns casual content into work you’re genuinely proud to share. Best of all, you don’t need a professional budget to get professional results.
Whether you gravitate toward a compact carbon fiber option like the Falcam Tripod for rugged outdoor adventures, a desktop tripod for polished home studio content, or a flexible-leg model that adapts to virtually any surface, there’s an affordable solution perfectly suited to your shooting style. The key is matching the tripod to how you actually create, not chasing specs you’ll never use. Use the step-by-step guide in this article to define your needs, compare your options with confidence, and start practicing creative techniques the moment your tripod arrives. The difference will show up in your very first shot — and you’ll wonder how you ever managed without one.