
Remember the last time you scrolled through a real estate listing, squinting at flat, lifeless photos trying to imagine yourself in the space? Those static images—often overexposed, awkwardly angled, and frustratingly incomplete—have dominated property marketing for decades. Now imagine stepping inside that same home virtually, moving freely through rooms, gauging ceiling heights, and feeling the flow between spaces as if you were physically there. This is the reality of 3D virtual home tours, and LiDAR technology is the driving force making it possible. For tech and photography enthusiasts eager to stay ahead of the curve, understanding this shift isn’t just fascinating—it’s essential. This article serves as your comprehensive guide to the transformation from static imagery to dynamic, immersive experiences. We’ll break down how LiDAR works, explore the hardware and AI-powered software that bring these tours to life, deliver an in-depth review of the Galois m2 device, and walk you through practical tutorials so you can create stunning 3D virtual home tours yourself.
The Evolution from Static to Dynamic: Introducing 3D Virtual Home Tours
Static images have long been the weakest link in property marketing. A wide-angle lens can distort room proportions, a single vantage point hides layout flaws, and no amount of HDR processing can convey how a kitchen connects to a living area. Buyers and design enthusiasts alike are left guessing, often arriving at properties only to feel misled. 3D virtual home tours solve this by offering complete spatial context—viewers navigate at their own pace, explore every corner, and develop genuine spatial awareness before ever stepping through the door. Engagement metrics reflect the difference: listings with virtual tours receive significantly more interaction and hold attention far longer than photo galleries alone. At the core of this transformation is LiDAR technology, which captures millions of precise spatial data points in seconds, creating the geometric foundation that makes photorealistic, walkable digital environments possible. With increasingly accessible LiDAR hardware and sophisticated AI-powered software now available to enthusiasts and professionals alike, the barrier to producing these immersive experiences has dropped dramatically—setting the stage for a closer look at the tools making it happen.
LiDAR Hardware Demystified: The Technology Behind the Scans
Understanding LiDAR hardware is the first step toward producing professional-quality 3D virtual home tours. At its core, this technology relies on precise optical components working in concert with sophisticated processing units, and choosing the right system determines whether your scans will produce stunning immersive experiences or frustrating, gap-filled models.
What is LiDAR and How Does It Work for 3D Mapping?
LiDAR—Light Detection and Ranging—operates on an elegantly simple principle. A device emits rapid pulses of laser light, which bounce off surrounding surfaces and return to a sensor. By measuring the time each pulse takes to complete its round trip, the system calculates exact distances to every point it strikes. Multiply this process by hundreds of thousands of pulses per second, and you generate a dense “point cloud”—a three-dimensional constellation of spatial coordinates representing every surface in a room. For interior 3D mapping, these point clouds capture wall positions, ceiling heights, furniture dimensions, and architectural details with millimeter-level precision. Unlike photogrammetry, which reconstructs geometry from overlapping photographs and struggles with uniform surfaces like white walls, LiDAR directly measures geometry regardless of texture or lighting conditions. This makes it exceptionally reliable for indoor environments where controlled lighting isn’t always possible.

Essential LiDAR Hardware for Professional and Enthusiast Use
The LiDAR hardware landscape spans from smartphone-integrated sensors to dedicated professional scanners, each occupying a distinct niche. Professional-grade terrestrial scanners deliver extraordinary point density and range but demand tripod setups and extended capture times at each station. Handheld SLAM-based devices like the Galois m2 represent a middle ground—they combine inertial measurement units with LiDAR sensors to track their own position while scanning, allowing you to walk through a space and capture it continuously. When selecting LiDAR hardware, prioritize three factors: accuracy (sub-centimeter is ideal for architectural documentation), portability (lighter devices enable faster workflows and reduce fatigue during multi-room scans), and software compatibility (ensure your scanner exports in formats your processing platform supports, such as PLY, E57, or LAS). Battery life also matters more than specs suggest—a device that dies mid-scan forces you to restart alignment from scratch. For enthusiasts entering this space, handheld devices offer the best balance of capability, learning curve, and investment.
AI-Powered Software: Transforming Data into Immersive Experiences
Raw LiDAR data—millions of floating spatial coordinates—is impressive but uninhabitable. AI-powered software bridges the gap between point clouds and the polished, navigable 3D virtual tours that captivate viewers. These platforms ingest dense scan data and apply machine learning algorithms to automate processes that once required hours of manual intervention, transforming technical datasets into experiences anyone can explore with a web browser.
How AI Enhances LiDAR Data for Virtual Tours
Machine learning algorithms tackle the messiest challenges in scan processing. They identify and remove noise—stray points caused by reflective surfaces, glass, or moving objects during capture. AI-driven registration automatically aligns overlapping scans from different positions, correcting drift that accumulates in SLAM-based captures. Neural networks handle hole-filling, intelligently reconstructing surfaces in areas where laser pulses couldn’t reach, such as tight corners behind furniture. Perhaps most impressively, AI texture mapping synthesizes photorealistic surface appearances by blending captured imagery with geometric data, compensating for uneven lighting and color inconsistencies across different scan positions. The result is a seamless mesh that looks and feels like the real space rather than a digital approximation.
Top AI-Powered Software Platforms for Tour Creation
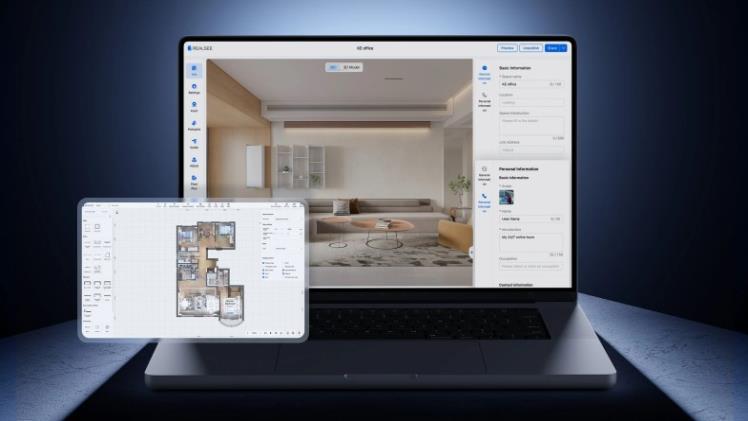
Several platforms stand out for turning scans into shareable tours. Matterport’s cloud-based pipeline remains the most recognized, offering automatic floor plan generation, dollhouse views, and measurement tools—though it ties users to a subscription model. Realsee has gained traction in the PropTech space with its spatial data processing capabilities and virtual tour hosting infrastructure, particularly for users seeking flexible deployment options. Polycam appeals to enthusiasts with its intuitive mobile workflow and rapid processing, supporting LiDAR-equipped devices with minimal configuration. For advanced users, 3D Scanner App provides granular export controls and mesh editing capabilities. GeoSLAM’s Connect platform excels at handling large-scale scans with professional-grade registration accuracy. When evaluating options, focus on three criteria: processing speed for your typical scan size, the quality of automatic stitching without manual correction, and whether the platform supports interactive elements like embedded media, annotation hotspots, and guided walkthrough paths that elevate a static model into a genuine tour experience.

Galois Review: An In-Depth Look at the m2 for Tech Enthusiasts
For tech enthusiasts seeking a dedicated scanning solution that bridges the gap between consumer-grade smartphone sensors and prohibitively expensive professional systems, the Galois m2 has emerged as a compelling contender. This handheld SLAM-based scanner targets users who demand architectural-grade results without the complexity of tripod-mounted terrestrial systems. After extensive testing across residential interiors ranging from compact apartments to multi-story homes, this Galois review examines whether the m2 delivers on its promise of accessible, high-fidelity 3D capture.
Features and Specifications of the Galois m2
The Galois m2 packs a solid-state LiDAR sensor capable of capturing up to 300,000 points per second with a scanning range extending to 25 meters indoors. Its integrated IMU and visual-inertial odometry system enable real-time SLAM processing, meaning the device continuously maps its own trajectory while building the point cloud around you. The field of view covers 70 degrees vertically, requiring deliberate scanning motions to capture floor-to-ceiling data in a single pass. Onboard storage handles roughly 90 minutes of continuous scanning, while the built-in display provides live feedback showing coverage gaps in real time. Compatibility is broad—the m2 exports natively in PLY, E57, and LAS formats, integrating smoothly with platforms like Matterport, Polycam, and GeoSLAM Connect. The device also supports direct Wi-Fi transfer to companion mobile apps for field preview before committing to full desktop processing.
User Experience: Pros, Cons, and Verdict on Galois m2
In practice, the m2 excels in three areas. Accuracy consistently lands within 2-3 millimeters across tested environments, sufficient for architectural documentation and virtual tour creation alike. Portability is genuinely impressive—the device weighs under 800 grams and balances comfortably for extended scanning sessions, especially when paired with a portable gimbal. The real-time coverage visualization eliminates the common frustration of discovering missed areas only after processing. However, the m2 isn’t without limitations. The learning curve is steeper than smartphone-based alternatives; achieving clean scans requires understanding optimal walking speed, overlap patterns, and how to handle reflective surfaces like mirrors and glass doors that confuse the sensor. Battery life, while adequate at roughly 2.5 hours, feels tight when scanning larger properties with multiple floors. Compared to alternatives like the Leica BLK2GO, the m2 sacrifices some point density but gains significant workflow speed and a more accessible entry point. For enthusiasts ready to invest time in mastering scanning technique, the Galois m2 represents an excellent balance of precision, portability, and versatility—making it a strong recommendation for anyone serious about producing professional-quality 3D virtual home tours without enterprise-level budgets.
Mastering the Tools: Console Tutorials and Portable Gimbal Setup
Owning capable hardware and software means little without the practical knowledge to use them effectively. This section addresses the hands-on skills that separate mediocre scans from professional-grade captures—covering both the software interfaces where you’ll manage your data and the physical stabilization equipment that ensures clean, consistent results in the field.
Step-by-Step Console Tutorials for Software Navigation
Most processing platforms include console or command-line interfaces that unlock functionality beyond what graphical menus expose. In GeoSLAM Connect, for instance, the processing console lets you adjust drift correction intensity, set point density thresholds, and batch-process multiple scan files without manually loading each one. Start by familiarizing yourself with the import workflow—drag your E57 or PLY file into the workspace, verify the coordinate system, and run initial registration. From there, learn the refinement commands: noise filtering parameters control how aggressively stray points are removed, while decimation settings balance file size against visual fidelity. In Polycam’s desktop environment, the console provides access to mesh resolution controls and texture baking quality settings that aren’t available in the mobile app. Practice with a single-room scan before tackling full properties—this builds intuition for how parameter changes affect output quality without risking hours of capture work on incorrect settings.
Optimizing Scans with a Portable Gimbal: Setup and Best Practices
A portable gimbal transforms handheld scanning from an exercise in steady hands to a repeatable, fatigue-free process. Mount your LiDAR device—such as the Galois m2—on a three-axis gimbal rated for its weight, ensuring the mounting plate sits level and the device’s sensor faces forward without obstruction. Calibrate the gimbal’s balance before powering on stabilization motors; an unbalanced setup forces motors to overcompensate, introducing micro-vibrations that degrade scan accuracy. When scanning, walk at a consistent pace of roughly 0.5 meters per second—fast enough to maintain SLAM tracking continuity but slow enough for adequate point overlap. Move through doorways deliberately, pausing briefly to let the sensor capture frame geometry from multiple angles. In hallways, sweep the gimbal gently left and right to expand effective field of view coverage. Avoid sudden direction changes, which can cause IMU drift spikes. After each room, glance at the real-time coverage display to confirm full capture before moving on—backtracking to fill gaps mid-scan is always preferable to discovering them during post-processing.
Your Step-by-Step Guide to Creating a 3D Virtual Home Tour
Step 1: Planning Your Scan and Preparing the Space
Successful tours begin before you power on any device. Walk through the property first, noting natural light sources and identifying areas where artificial lighting needs adjustment—consistent, diffuse illumination produces the cleanest texture captures. Remove transient clutter like shoes by doorways, charging cables on counters, and personal items that distract from architectural features. Define your scan path on paper or mentally, planning a logical room-to-room sequence that minimizes backtracking. Ensure doors between spaces remain open to maintain line-of-sight continuity for SLAM tracking. Close window blinds partially to reduce harsh sunlight that can overwhelm sensors and create blown-out textures on walls near glass.
Step 2: Executing the Scan with LiDAR Hardware and Gimbal
Mount your Galois m2 on your calibrated portable gimbal and power both devices on, allowing the IMU thirty seconds to initialize. Begin in the largest room—this gives the SLAM algorithm abundant geometric features to establish a strong initial position lock. Walk your predetermined path at a steady half-meter-per-second pace, sweeping gently to capture walls and ceilings within the sensor’s 70-degree vertical field of view. Pause two to three seconds at doorway thresholds, letting the device register frame geometry from both sides. Monitor the real-time coverage display continuously, watching for dark patches indicating missed surfaces. When encountering mirrors or glass, approach at oblique angles rather than head-on to reduce sensor confusion from specular reflections.
Step 3: Processing and Stitching with AI-Powered Software
Transfer your completed scan file via Wi-Fi or direct connection to your processing platform. Import the E57 or PLY file and run automatic registration—the AI will correct accumulated drift and align overlapping segments. Review the initial point cloud for obvious gaps or noise clusters, then apply noise filtering at moderate intensity to preserve architectural detail while removing stray points. Next, generate the mesh and initiate texture baking, selecting high-quality settings for final output. Once the base model renders cleanly, add interactive elements: place navigation hotspots at logical transition points between rooms, embed annotation tags highlighting notable features like built-in storage or renovated fixtures, and configure a guided walkthrough sequence that mirrors how someone would naturally explore the home.
Step 4: Finalizing, Publishing, and Sharing Your 3D Tour
Export your finished tour in a web-compatible format—most platforms generate embeddable links or iframe codes requiring no plugins for viewers. Before publishing, review the tour on both desktop and mobile browsers to verify smooth navigation and texture loading at different connection speeds. Compress texture files if load times exceed five seconds on standard connections. For real estate applications, embed the tour directly into property listings and share standalone links across social media channels where visual content performs strongest. Add a dollhouse overview as the entry point so viewers immediately grasp the full layout before diving into room-level exploration. Track engagement analytics after publishing—time spent in tour, most-visited rooms, and drop-off points reveal what captures attention and where future scans can improve.
Embracing the Future of Immersive Property Experiences with LiDAR
The journey from flat, misleading property photos to fully navigable 3D virtual home tours represents one of the most significant shifts in how we document and experience physical spaces. LiDAR hardware provides the geometric precision that makes these experiences trustworthy—capturing rooms as they truly exist rather than as a camera lens interprets them. AI-powered software then transforms those raw spatial measurements into polished, interactive environments that anyone can explore from a browser. As this Galois review demonstrated, devices like the m2 have brought architectural-grade scanning within reach of enthusiasts willing to invest in learning proper technique, while console tutorials and portable gimbal workflows ensure that investment pays off in consistently professional results. The technology is no longer reserved for enterprise budgets or specialized technicians. Whether you’re marketing properties, documenting renovations, or simply passionate about spatial capture, the tools covered here give you everything needed to produce immersive tours that genuinely transport viewers into a space. As LiDAR sensors shrink further, AI processing grows faster, and sharing platforms become more seamless, the gap between physical presence and virtual exploration will continue to narrow—and those who master these workflows now will be best positioned to lead that future.