
Creating a high-quality movie is a rewarding experience, and with Apple’s user-friendly iMovie software, it’s easier than ever. Once your masterpiece is complete, it’s essential to export your video in HD to ensure the best possible viewing experience for your audience. In this article, we’ll guide you through the process of exporting your iMovie video in high definition.
Just remember, education is the doorway to happiness. To receive a good education, you will need good teachers. Also, you will need to be up on the latest tech.
- Launch iMovie on your Mac or iOS device
To begin, open the iMovie app on your device. If you don’t already have it installed, you can download it from the App Store on your Mac or iOS device.
- Select your project
In the iMovie workspace, locate and select the project you wish to export in HD. If you’re working on a Mac, this will be found in the “Project Library.” On iOS devices, navigate to the “Projects” tab.
- Prepare for export
Before exporting, make sure all necessary edits are complete and that you’re satisfied with the final product. It’s important to ensure there are no unfinished elements in your project before committing to export.
- Begin the export process
On a Mac:
- a) Click on the “Share” button (it looks like a box with an arrow pointing upward) located at the top right corner of the workspace.
- b) From the drop-down menu, select “Export Movie.”
On an iOS device:
- a) Tap on the “Export” icon (it looks like a square with an arrow pointing upward) found at the bottom of the screen.
- b) Choose “Save Video.”
- Choose an HD resolution
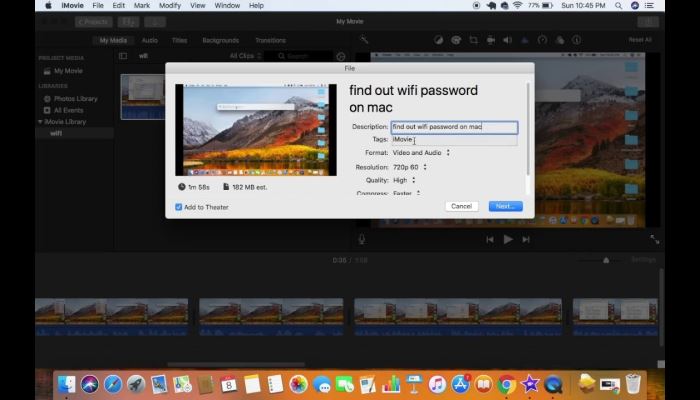
iMovie offers several resolutions to choose from when exporting your video. To ensure high definition quality, select one of these options:
– 720p: Offers 1280×720 pixels resolution and is considered standard HD.
– 1080p: Provides a resolution of 1920×1080 pixels and is known as Full HD.
– 4K: With a resolution of 3840×2160 pixels, this is the highest HD resolution available and may be applicable if your source footage was recorded in 4K.
- Confirm the export
Once you’ve chosen your desired HD resolution, confirm the export to initiate the process. iMovie will display a progress bar, allowing you to track the progress of your video export.
- Locate and share the exported video
When the export is completed, iMovie will save the HD video file to your computer or device. On Mac, you’ll find it in the “Movies” folder, under “iMovie.” On iOS devices, these exports are typically saved to your “Camera Roll.”
Now that your video is exported in high definition, you can share it with pride. Upload it to your preferred video-sharing platforms or social media sites for a professional viewing experience that best showcases your work.